About

Computer Software is Your Friend is a multi-author blog that aims to help computer users with day to day issues, along with providing relevant news, quick tricks and tips to people who request them.
Showing posts with label Windows. Show all posts

Windows 8.1 May Bring Back the Start Button

Monday, April 22, 2013

Windows 8.1 leaks have been occurring left, right, and center these days along with not only rumors, but confirmed code. So far we've heard of 'kiosk mode', and that Windows 8.1 will feature a boot to desktop option, but something else seems to be astir in the tech blogosphere.

According to The Verge and their sources who are familiar with Microsoft's plans have revealed that the Start button that everybody misses so dearly is set to return to a desktop near you! While ZDNet's Mary Jo Foley previously wrote on the matter, it's only recently that we are receiving multiple confirmations for these plans.

Many say the Microsoft killed the start button, when is not the case. They've simply moved it off screen. Out of sight, where you can't see it. They've created a steep learning curve for those not technologically inclined and made it difficult, for those who are forced to work with Windows 8, to adapt. While Microsoft previously explained their reasoning, customers have still been begging for the portal to return to it's original positioning.


Installing Windows 8 RTM on Any System

Thursday, August 16, 2012

UntitledInstalling Windows 8 RTM is very easy and straight forward but if you are using a system that uses a display of less than 1024X768 like an Aspire One Netbook which has a maximum resolution of 1024X600, then you will have some extra steps in order to be able to use the new features that come with Windows 8.

Installing Windows 8: Dealing with Netbooks and Terrible Displays

Screenshot (8)Windows 8 has RTM’d and we now have a good idea of the features it offers, but for those who use a netbook, the first thing you will notice is an error message alerting you that your screen resolution is below the required 1024X768 by Microsoft. Don’t despair, we can change that with one very quick and easy trip to the registry.

Get Windows 8 Pro for $39.99 or get Surface

Monday, July 2, 2012

Microsoft is set to release Windows 8 to consumers and apart from shocking people with the announcement of its tablet: Microsoft Surface, it is also set to sell Windows 8 at a competitive price of only $39.99 – in comparison to the near $250 CAD for Windows 7 Professional or more for Ultimate. The upgrade process is set to be easy, and Surface looks hot.

Preparing Windows 8 Install Media–or not

Saturday, June 2, 2012

imageWindows 8 Release Preview is out and comes in multiple languages and in 32 bit and 64 bit flavors. For those of you that download the 5mb install manager, this may be something you already knew or something you will come to discovering for the first time.

Windows 8 Release Preview is Out

Thursday, May 31, 2012

Microsoft released Windows 8 Release Preview today and it includes various improvements to existing Beta Metro Software and a more refined experience.
Microsoft’s Official Release Video for Windows 8 Release Preview

Download Windows 8 Release Preview

Windows 8 Release Preview

Disable the Lock Screen in Windows 8 Consumer Preview

Tuesday, April 10, 2012

Let's all say it together: Windows 8 is major eye candy! That said, there's also something else to be said: it's hard to use on a netbook or desktop (less difficult for the latter though). But whether you're on a desktop, netbook or even a laptop, you may want to disable that pesky lock screen. Here's how:

Step 1: Press Win + R to initiate the "Run" prompt

Step 2: Type in gpedit.msc and hit Enter

Step 3: In the Window that appears ,(see screenshot below for reference) navigate to Computer Configuration > Administrative Templates > Control Panel > Personalization.


Step 4: After doing so, double-click on the Do not display the lock screen option and click on the "Disabled" radio button. Hit Apply and the lock screen will be no more!

Windows 8, made by Redmond-based software developer Microsoft, still has a lot of skeptics to win over and it's not surprising that a lot of users are complaining about the new changes including the lack of "Start Menu" or even the Orb in itself. 

As always, Have a nice day!


Windows 8 Consumer Preview in Review: Dealing with Netbooks

Tuesday, March 13, 2012

Screenshot (8)Windows 8 Consumer Preview is out and we now have a good idea of the features it offers but for those who use a netbook, the first thing you will notice is an error message alerting you that your screen resolution is below the required 1024X768 by Microsoft. Don’t despair, we can change that with one very quick and easy trip to the registry.

Windows 8 Consumer Preview in Review: The New Keyboard Shortcuts

Windows 8 introduces a new way of looking at the traditional computer and for most, this list of keyboard shortcuts may come in handy.

Windows 8 Consumer Preview in Review: The New Features

Windows 8 Consumer Preview in Review: The Apps

Screenshot (10)_thumb[2]

The app store for the moment is lacking and doesn’t contain much but with a Visual Studio Beta program and knowledge of a combo of either Java and Html or C# and XAML, you can easily write apps for the program. But for now, let’s explore what we have!

Windows 8 Consumer Preview in Review: Introduction

Microsoft has released the Consumer Preview of Windows 8 and it has many new features. Let’s dive in.

While not all of these features are complete, this is not RTM and Microsoft will likely/hopefully be filling in the gaps.

Evaluating Windows 8 Developer Preview

Sunday, February 5, 2012

IMG_0084Microsoft is in the process of developing its next version of Windows and it will be nothing like its predecessor. I have been using the Developer Preview since its release back in September and here is how it went.

Triple Booting Windows, Mac OS X and Ubuntu

Saturday, January 21, 2012

Ever wanted to have all three different worlds on your computer at your fingertips? Or did you ever want to have a computer that only has Mac OS X and Ubuntu? Don’t hold your breath, it’s possible! Here’s how.

Resizing Partitions in Windows Vista and Later

Sunday, January 15, 2012

Resizing partitions in Windows became simpler when partitioning tools became part of the operating system with Windows Vista. This tutorial will show you how to resize partitions in Windows Vista and later. If you are using Windows XP, your best bet is Easus Partition Manager (download link included in article) which is free and fairly simple.

Creating and Deleting Partitions in Windows Vista and Later

Creating and Deleting partitions in Windows became simpler when partitioning tools became part of the operating system with Windows Vista. This tutorial will show you how to create and remove partitions in Windows Vista and later. If you are using Windows XP, your best bet is Easus Partition Manager (download link included in article) which is free and fairly simple.

How To Install Windows 8 Developer Preview

Friday, December 30, 2011

imageWindows 8 Developer Preview is available for download and is easy to install in a virtual machine or on a test machine – or if you are bold enough, your everyday machine. The installation process is similar to that of Windows 7 and Vista so this method can be applied to those install scenarios as well.


First, you will need the Windows 8 install isos. If you are a developer, there is one with developer tools for you to use. Otherwise, choose the 32 bit or 64 bit version based on preference or current machine. If you are running Windows Vista or Windows 7, you can find out if you’re running 32 or 64 bit by going to Computer and then System Settings. Scroll down and it will give you all the information that you need to know.


Download Windows 8 Developer Preview ISO

Windows 8 Developer Preview


Now you will need to burn it to a DVD using Windows Image burner in Windows 7 or your favorite app in any operating system or copy the bits over to a USB drive.


I have provided a video with the explanation that you can watch above, but for specifics:

  1. Boot off the Windows Install Media
  2. You will be greeted with a language selection, click next.
  3. You will be given a window with an Install Now button, click on it.
  4. The screen will say Setup is Starting and load for a minute or two.
  5. You will then be prompted to agree to Microsoft’s terms. Click the checkbox and click next.
  6. Now you will be asked to either do an Upgrade Install or a Custom Install. You should always do a clean install of Windows and hence choose Custom.
  7. Choose the Partition that you want to install on or click Advanced Tools to create or format a partition and hit next. Note: You cannot shrink a partition in the installer so if you don’ want to lose another partition’s files, partition your hard drive before doing the installation using the manager in Windows Vista or Windows 7 (type partition in the start menu) or Easus Partition Manager, a free download.
  8. The Windows Install when then automate and install by itself, restart and continue the installation – unless you changed a bios setting, you should be fine to leave the room for 15 to 25 minutes – depending on the speed of your computer.
  9. It will do some configuring and possible restart a few times and then you will be prompted with the first real questions that you will need to fill in.
    1. In Windows 7 and Vista. these questions are easy, straight forward, and are directly related to your account (Name, Password, Time, Date, Network Settings, Update Settings).
    2. Windows 8 presents its second phase a bit differently from Vista and 7. It cuts out a lot of the questions. You will be asked to enter your name and then choose between express settings and custom settings. Express settings places all the default options that don’t require your attention, if you click custom, you will get the opportunity to tweak update settings, security settings, and other very technical settings that the average user wouldn’t have to worry about. In the video I choose Custom just to give you a tour – I ended up changing nothing.
  10. Among the few questions that you will be asked in Windows 8 is to enter your Windows Live ID and its password, there is a link on the bottom to opt out and create a normal offline account. This essentially makes life easier if you install Windows 8 on multiple machines as it syncs certain settings.
  11. In the offline mode, you may be prompted with a chance to take a picture from your webcam but the questions are very straight forward.
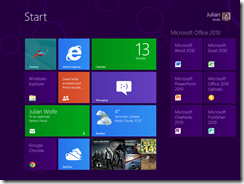
  12. It will then Prepare your Desktop as every Windows system does at the first log in and you will be greeted to a new Start menu which is a full screen menu based on the Metro UI. In previous versions of Windows, you will be greeted by the desktop.

Installing Windows 8 is similar to installing Windows Vista and Windows 7 and is very easy to do as the bulk of the installation is automated and the second half asks you easy questions that aren’t technical, but rather based on your preferences for account name and time and that.

Facebook Releases Messenger Application for Windows

imageAfter the project was leaked, Facebook made a Help page regarding a new application that Facebook would be releasing to Windows users. The Messenger App brings Facebook to the Windows desktop in a minimalist design.


The app is in trial (beta) mode and will change throughout the process. It will self-update and Facebook developers encourage you to give feedback.


The app will let you chat with your Facebook friends, see your ticker feed and get quick notifications from the comfort of your desktop.


Download Facebook’s Messenger For Windows

Messenger for Windows


When you download and install the program, you will be greeted with this window where you will be prompted to log into your Facebook account.


image

When you log into the Facebook app, it will keep you logged in until you sign out. If you close the Window, it will hide in your notifications area.


image


The log in process will open your default browser to Facebook to log in.

You will then get a notification in the taskbar which when you clock will present you with your desktop version of Facebook.


image


From first testing it, the app is buggy, resizing the window can make your contacts vanish.


The interface is a windowed version of Facebook’s right hand bar which features ticker and your contact list along with the 3 default notification areas and a link to your profile on top.


image

Each of the notification icons on top, when activated will take a bit of the space that ticker takes and contains a scrollbar. It always stays confined to its window size.


Chatting with people opens a new window with a tab for each person. Unfortunately, if you are running Windows 7, each tab will not be individually displayed in the preview icons of your taskbar – as is the case with Windows Live Messenger or MSN.


image


If you are very addicted to Facebook, there is a feature which lets you dock it to the right of your screen. No Window will come on top of it and it will act just like it does on the Facebook website.


This feature and whether or not you want it to notify you when new messages arrive can be found in its icon in the notification area.


You can also toggle its dock mode with the bottom right button – next to the search bar.


Overall, the app is handy for those who don’t want to keep a browser open, but  it is still in trial and with time, most will likely prefer to keep Facebook in the browser.


So, feel free to give it a try. What do you think of this program? You can leave your thoughts in the comments section below.

Use a USB Key to Install Windows on Any System

Putting the Windows installation on a USB thumb drive has a few advantages—a small USB key is much more convenient to carry around than a DVD. The Operating System will install much faster, and you can use a USB key to install Windows on systems that do not have a DVD drive, such as a netbook. All it requires is some work in Command Prompt and your USB will be Windows installation ready.


Don’t put the USB drive in yet, that will come later.


First, you’ll need to make sure that you have DiskPart utility on the system, it comes free with Windows, but if you don’t have it, you can download DiskPart here.


If you are using Windows XP, it is advisable that you run Command Prompt and type the following and hit enter to run it.

DiskPart

Otherwise, for Windows Vista and Windows 7 users, launch the DiskPart utility by typing diskpart in the Start Menu.


Now, run the list disk command by typing the following in Command Prompt and hit enter to check the status of your drive.

list disk

You will see all of your drives but the USB which is handy because you will run list disk again after inserting the USB.


[image%255B4%255D.png]


[image%255B9%255D.png]


Now run select disk 1 by typing the following and hit enter where the number is the corresponding number of your USB drive.

select disk 1

Then you will clean the disk by typing the following and hitting enter. This will erase everything off the disk in the process.

clean

Now, you can run create partition primary by typing the following and hitting enter.

create partition primary

Make the partition active by typing the following and hitting enter.

active


[image%255B15%255D.png]


Next comes the file system, type the following and hit enter.

format fs=fat32 quick

OR

format fs=ntfs quick

Next, you need to be able to access it from Windows Explorer by assigning it a drive letter. Type the following and hit enter.

assign

[image%255B23%255D.png]


Now, go to Windows Explorer, and copy the contents from the Windows setup disk to the USB. You can do so by dragging and dropping. You can close Command Prompt and DiskPart since the USB is now complete.


Once the copy is done you can eject the USB and use it to install on other systems. To boot off the USB, at boot, hit whatever key it says will run set up. Once you are in the BIOS, you will go to Disk Priority, a small exploration won’t hurt and set the removable disk to first priority. If that doesn’t work, then you will look for the hard drive priority and make the USB priority over the main – the USB will be recognized as a hard drive. Once the install is done, or it reboots, enter the BIOS setup again and reverse what you did and let the rest of the setup and the Operating System finish installing itself and run on its own.

Connecting to a Windows PC From Ubuntu 11.10

Thursday, December 8, 2011

Ubuntu is a free and open source operating system which is growing and maturing and could one day be a competitive force with Mac OS X and Windows. However, if you want to connect an Ubuntu PC to a network containing a Windows PC and allow communication, there are some things you will need to do.

 
Computer Software is Your Friend © 2012 | Designed by Bubble Shooter, in collaboration with Reseller Hosting , Forum Jual Beli and Business Solutions